Welcome to My Studio: How to Build Your Own DIY Photo Studio
adminShare
If you're an amateur photographer, it can be hard to find an affordable space to work on your craft.
Most photographers don't make an amazing living with their work. Unless you're doing it commercially (weddings, parties, etc.) or you're super successful, you probably don't have an office or studio to shoot and edit.
It's unfortunate, but the good news is that you can make a serviceable studio in the comfort of your home. In this post, we're going to give you a few tips on how to build your own DIY photo studio. Shockingly, you only need a room and a few pieces of equipment to make high-quality pieces out of your photos.
Let's find out what you need to get to make this happen.
What Do You Need in Your DIY Photo Studio?
To be honest, there are only a few essentials that you need to have in your makeshift studio and the rest is up to you. It'll still cost a bit of money, but if you start saving up now, you can have something great built in no time.What Are You Shooting?
The first thing you'll want to do is carve out some space from your living area to turn into a studio. If you're in a home, you can take a spare room or somewhere in your basement, but if you're in an apartment, you'll have to make do with the corner of a room. What you're shooting will determine exactly how much space you need. Are you shooting still life objects or products? Are you shooting people or animals? You can get by with a small corner of a room, but lighting and the focal lengths will be more controllable with larger spaces.Lighting & Backdrops
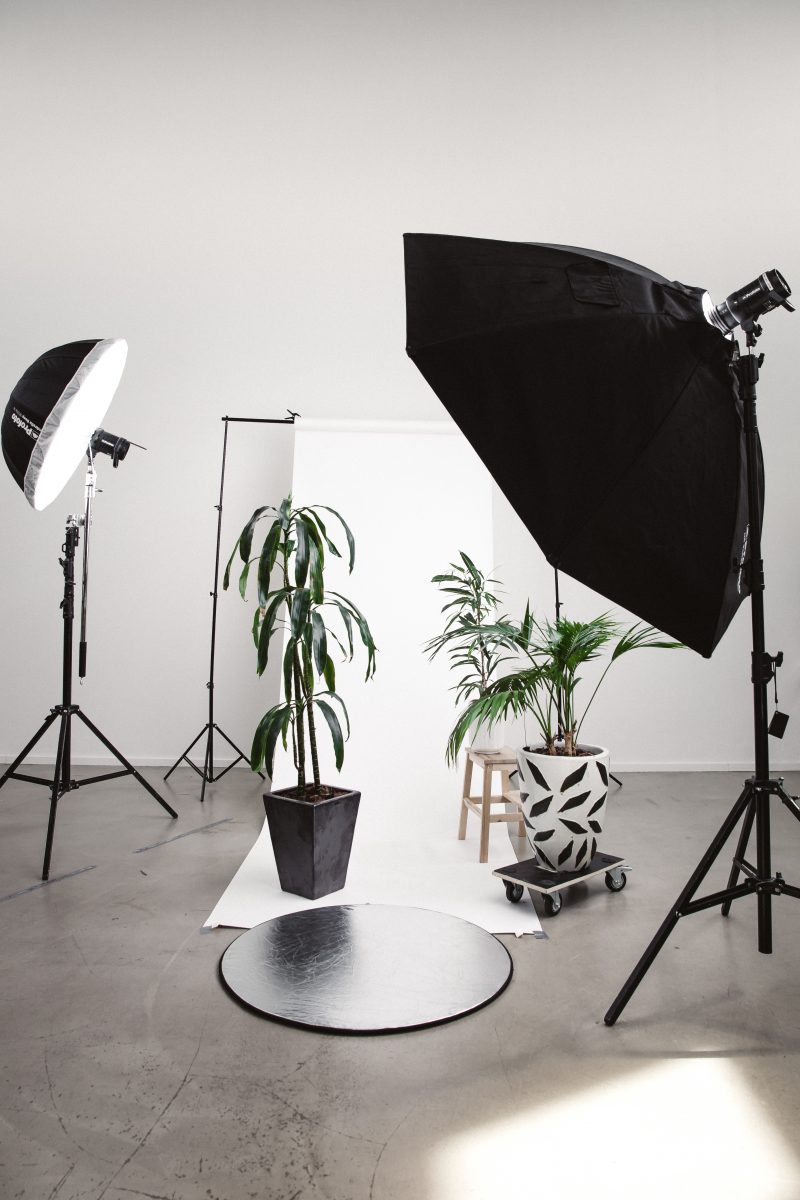
The cheapest and best form of lighting is of the natural variety. Hopefully, you've got some windows in your studio space to make use of the natural lighting. You can control the lighting very easily with cloth, cardboard, and other things you can find around the home. Many small apartments are devoid of natural light, however. In this case, you'll have to use artificial lighting, which will require some investment that we'll talk about in the next section. Your backdrops will be important when you're shooting in a makeshift studio. For something basic, you can just hang up plain white sheets as your backdrop. If you want something more vibrant, you can dye some fabric or sheets that you have lying around, hand paint some canvas or a wooden board, and always try to make use of your walls that have an interesting look to them.What Gear Do You Need?
Of course, you will have to invest in some equipment to make your studio space function properly. Here are a few items to look for:- You can make it work with one light, but three will give you a lot of flexibility.
- A reflector and an umbrella are essential, and they're also very cheap and easy to find.
- Light stands are important to be able to customize the lighting if it's artificial. If your lights are heavy, your stands should be as well to support them.