How to get started in Screen Printing - A Step by Step Tutorial
adminShare
Although screen-printing is not really our core business here at Print Peppermint, we still love the heck out of it!
Many of our team members, including Taro (our lead designer) have particular expertise in screen printing.
Things like: hand-pulling screen-printed posters and color separations for apparel printing like T-shirts. In fact, Taro still consults regularly with a huge Texas-based apparel production house called PXP Solutions (formerly "Pony Printing").
Anywho we found this amazeballs video on youtube about how to get started with screen printing, including the gear you need and the knowledge.
We had our good friends over at SpeechPad do an audio transcription for us in case you felt like scanning the material rather than watching the video above.
Either way, let us know in the comments if you feel like anything was left out of David's lesson plan here and we can have Taro chime in on it.
Transcription:
Source: https://www.youtube.com/watch?v=RSpsWewtxXw
Welcome to "Make Something" with me, David Picciuto. And today we're gonna learn the basics of screen printing. Check it.
Screen printing is a process of pushing ink through a mesh screen. In its current state, ink can pass through this entire screen, so we need to mask off the areas where we don't want the ink to go through.
We'll use a photosensitive emulsion, coat the entire screen, put transparency over top of that, expose it to light, and then wash it out and our image will appear on the screen that we can use to print posters, wood, and whatever else you want. It's a really cool process and I wanna show you how you can do it at home.
I'm using pre-made aluminum frames. I've already gone ahead and cleaned the screens using a degreaser.
I'm using a dual-core emulsion which comes in two parts. And once you mix it, it becomes light sensitive.
So, before I opened this up, I need to turn off the lights and use the darkroom lights when using this. This is a scoop coater. This is made for this size screen.
I'm gonna lean my screen up against my bench. We're gonna do the backside first and then we're going to flip it around and do the other side.
So, I'm gonna take my scoop coater, I'm gonna put it on the bottom, tilt it until the emulsion hits the screen and good pressure and nice and even speed all the way up to the top.
So, now we're gonna flip it over this way. Should have a nice even surface on there. That looks pretty good. I'm gonna do a second screen because we're gonna do a two-color process.
So, now we need to let this dry for about 45 minutes to an hour, but it does need to be completely dry before we move on to our next step.
So, now that the screen is dry, it's time to expose it. I'm just using this piece of wood because that's a lot flatter than my floor.
I have a very uneven floor here and I'm gonna set this piece of foam in there that's going to fit inside the frame. That's just gonna put pressure up on the screen. And then I printed out this transparency. I've got two of them, one for each color of my print.
You can print these out on a printer if you have a good quality photo printer like an Epson or a Cannon, or go to your local copy center and have them make a transparency for you.
So, I want to place this down, upside down on top here. I'm gonna take a sheet of glass and put it over top of that. Between that glass and the foam underneath, we've got a nice positive contact where that can't slide around and move. And it'll be right up against the emulsion.
I have a UV light. Again, I'll have links to all the stuff that I use down in the description. I've done some tests already and I want to set my light to 13 and three-quarter inches from the top here. So, this is a little exposure calculator.
And in my test, I've learned that I need to expose my screens for 10 minutes, but I'm gonna use this calculator every single time because as this bulb gets older, I'm gonna need to expose a little bit more and there are different numbers on here and we want to reach about a seven. And that'll make them a little bit more sense here in a little bit when we do the washout.
So, I'm just gonna take this little calculator and throw it in here. I got my timer on my phone. I'm going to expose this for 10 minutes. There it goes. Shut off the light.
So, the next thing I need to do is wash this out. I don't have a water source here in my shop so I'm gonna throw this in a couple of garbage bags so it doesn't get exposed to the light.
Take this into the bathroom and wash it out in the bathtub. First thing you need to do is get both sides wet. That'll stop the exposure and let the emulsion get a little soft for us to wash out.
So, now we'll let that sit and silt for a minute. I'm gonna use this sprayer head to wash out our non-exposed area of the screens. As soon as it starts to come out, we can turn the lights on and see a little bit better. That looks really good.
I got a really good exposure out there that came out nice and clean. Looking at our exposure calculator here, it's supposed to be at a seven. It did wash up to about a six, maybe a five. So, that means it might be just a little bit underexposed, but everything else looks good. I
f it was a warm day, we would just set this out in the sun and let the sun finish curing the rest of the emulsion. But it's snowy and wet and rainy today so we're gonna put this back underneath the UV light for a little bit and let that cure.
Exact same process, we got our second film down on there on the second screen. Turn on the light. All right. Time is up. We'll let that dry underneath the UV light. Got a fan going on there. We need to tape off the edges and I'm just going to use some packing tape. This will just stop ink from coming through on the edges.
Where we had our exposure calculator, we're gonna block that off with some tape on the bottom so ink doesn't get through there. And if you have any little pinholes, which I do, you can either use tape or a screen filler or you could even use the emulsion that you used earlier and just fill them up so ink doesn't get through.
So, I'm gonna take a piece of plywood that I have and then these are screen printing clamps. I'm going to screw them down to the plywood and then that will allow us to attach our screens to this. Cool beans.
I've got my paper here and I've got my two films. I got a red film and the black film and I'm going to line them up so then I can see where I want them to go on my paper. I'd say about right there. That looks about centered.
I will tape the bottom film right onto the paper so then I can use this to figure out where my paper needs to go because I can see through the top. Then once we get the paper where we want it, we can mark out our corners. This is where I want my paper to go.
I need a positive stop. I'm gonna use these little rulers and then just tape that down. So, now I should be able to quickly come in and put my paper down. And what that also does is it raises this up just a little bit so there's no contact with the screen on the paper. You want a little bit of off contact.
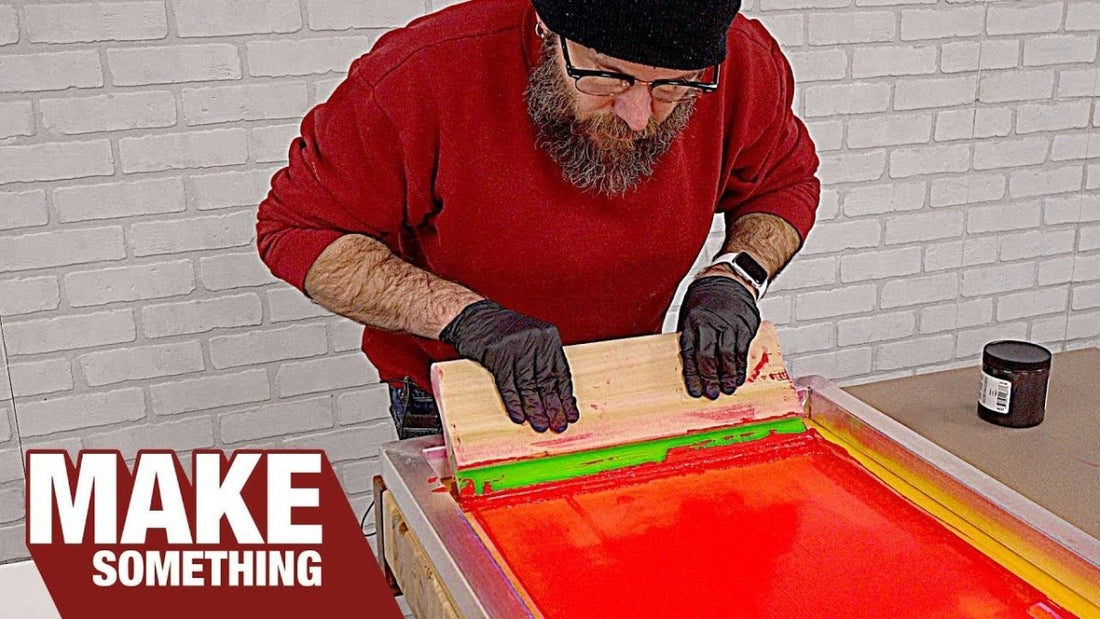
The squeegee that you want to use should be made for this size screen, we'll pour ink on to the screen and align. We'll lift it up, we will flood the screen, not pushing it through, set this down and then with good amount of pressure, push through and that ink should do its job.
So, we'll lift this up, we'll flood the screen, put it down, and then with a good amount of pressure, lift up, flood the screen, pull out our print. We did a couple with the pull technique and a couple with the push technique. The push technique definitely works a lot better.
We'll put our paper in here. We push, we lift it up, we flood the screen, and then we put our next one in. On the last one, don't do the flood. So, all the ink is in one side. There we go.
So, now it's time to clean up. This is the messy part. I got to do this in my bathroom. I found that if you have soap scum in your bathroom, the ink is gonna want to stick to that.
So, having a clean bathroom definitely helps. Before washing out, I also like to remove the tape and if we're gonna use the screen again, we'll just re-tape it. We got our second screen in there, it's all taped up, got the pinholes all cleared up.
So, I'm gonna take one of my misprints and I'm going to take the film positive and line that up and then tape them together. And so now like before, I can see my film positive through there. And we can find out exactly where we need to go. Tape that down to the board, take our rulers and tape them in place. So, now that should give us perfect alignment for the next color.
So, when I designed this, I designed the red to go underneath the black a little bit to give us a little bit of play so we don't have to be absolutely 100% perfect with the registration. Put our screen, push, flood the screen and swap out. Last one. And we've just been throwing them on the floor, letting them dry wherever they can. That's cool.
I have 50 signed copies of these on my website for sale. It's first come first serve. Once they are gone, they are gone and we're never going to reprint them. Patriot members, you should have already received a message for first dibs and a discount for being awesome. This is a ruler with a fraction to decimal conversion plus the bottom has a fraction decimal millimeter chart. This is really handy. This is something I need in my shop.
Also, I'm really looking forward to the metric versus imperial arguments in the comments. Stop picking fights and make something. Why did I make this video? Because I have a couple of furniture projects in the future whether I want to incorporate screen printing.
For example, I could make a credenza and on the front of those doors have a very colorful pattern printed on top of that plus some other cool fun ideas. And I wanna get into some fine art that's going to involve screen printing. I hope you got some inspiration out of this to think outside the box and make your projects a little bit more creative. I'm trying to take all the new things that I'm learning this year. Acrylic painting, screen printing, metalworking, blacksmithing, and combining all of that into my woodworking projects.
I wanna take this channel to the next level to encourage you to keep learning and experimenting. I borrowed about a dozen books from my library and picked out my two favorites that I actually ended up buying. If you wanna get into DIY screen printing at home, you need this book. It is as a step-by-step, super easy to read, great photos, great for printing t-shirts, posters, and whatever else. Very good.
If you wanna take it to the next level, this book takes it a step further into mixing inks, layering, some really cool, creative, fun experimental processes. So, these are the two books that I highly recommend you check out. Basically, what we did today came directly from this book.
I want to talk quickly about printing t-shirts. The process is basically the same except you're gonna have some different materials. This is a 230 mesh screen and that's a very high mesh count that gives you great resolution if you think of it as pixels.
Screen printing t-shirts uses a lower mesh screen to allow more ink to go through because textiles and t-shirts need a thicker layer of ink than paper. We used acrylic ink. If you wanna get into printing t-shirts, you need a fabric ink instead.
In t-shirts, each time you print a label, you need to flash it with heat to set that ink into the fabric. Otherwise, it's gonna wash out and that allows you to move onto the next color as well.
You're also gonna want a t-shirt press that allows you to put a t-shirt over a board and then has multiple screens in a carousel to allow you to print all the different colors.
Registration in printing t-shirts is far more critical, especially if you want to get into it as a business. I have absolutely no desire to get into printing my own t-shirts.
All the t-shirts that I sell on my website are printed right here in Toledo, Ohio by a company called Jupmode. They are friends of mine and they also print t-shirts for a couple of other YouTubers as well. You can keep reusing these screens. You'll probably get thousands of prints out of them or you can reclaim them with an emulsion remover.
That takes about 10 to 15 minutes to remove that emulsion and then you can expose your new design on there. If you do buy one of the prints from me and you make a frame for it, please tag me in your Twitter or Instagram. I'd love to see how you hang it up in your shop.
All right, folks, we will see you next week with a new project. As always, be safe, have fun, stay passionate, and make something.
Let us know if you learned something or disagree with anything that David said, in the comments below.
Cheers!


